beauty · nature · relaxation

Spring Has Sprung! Early Spring Blooms

I spent part of my week bemoaning the haggard look of my yard. With the warmer weather and more sunshine, my grass has been flourishing… And so have my “weeds”.

I’m inclined to quickly schedule someone to tend to the yard but, as a baby herbalist, I know that the new growth cropping up in my yard has a purpose. I also know that it’s to my benefit to be very familiar with local “weeds”, especially the ones in my own yard. So, before I get the first lawn mowing of the season, I decided to learn more about these early spring weeds.

My mini violet bouquet

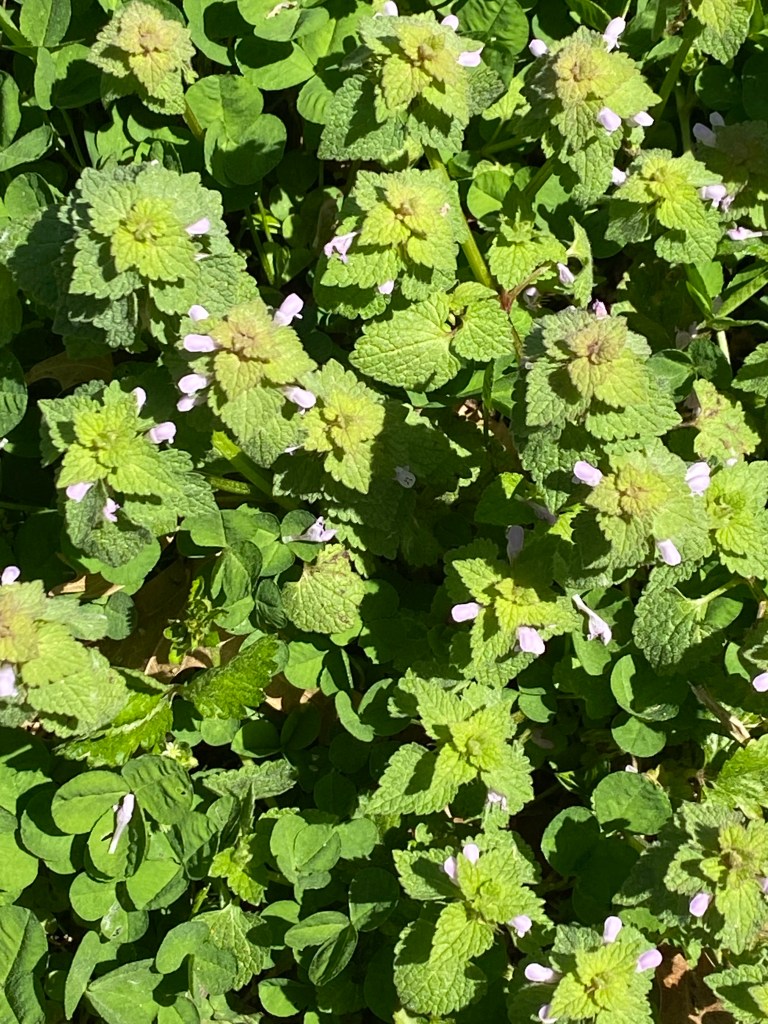
I have a ton of purple dead nettle in my yard. These pretty little plants are among the first to shoot up when the seasons change. I harvested some and dried them, and I plan to try making a tea with them. These are purported to help with seasonal allergies and are also supposedly anti-inflammatory, anti-bacterial, diuretic, purgative, etc.,. Luckily, these plants – and their lookalike, henbit – are edible. Unluckily, I dislike the flavor of fresh purple dead nettle. I’m hoping that the dried leaves can be combined with another herb to make a pleasant tea.

A patch of purple dead nettle

I found a narrow leaf plantain coming up near my driveway. I don’t plan on doing anything that requires me to use plantain, as this is commonly used to numb the sting from stinging nettle and from insect bites and stings. But, it’s good to have it nearby, just in case I get a bug bite that needs attention.

Narrow leaf plantain

My yard also gets quite a few mock strawberries (snake berries) later in the season. These little devils are harmless and edible but they have no flavor. For now, I’m seeing their pretty flowers and sighing about how those little tasteless berries will be popping up soon. Though the resulting fruit tastes like water, the blooms are sunny spots in my yard.

Mock strawberry (snake berry) bloom

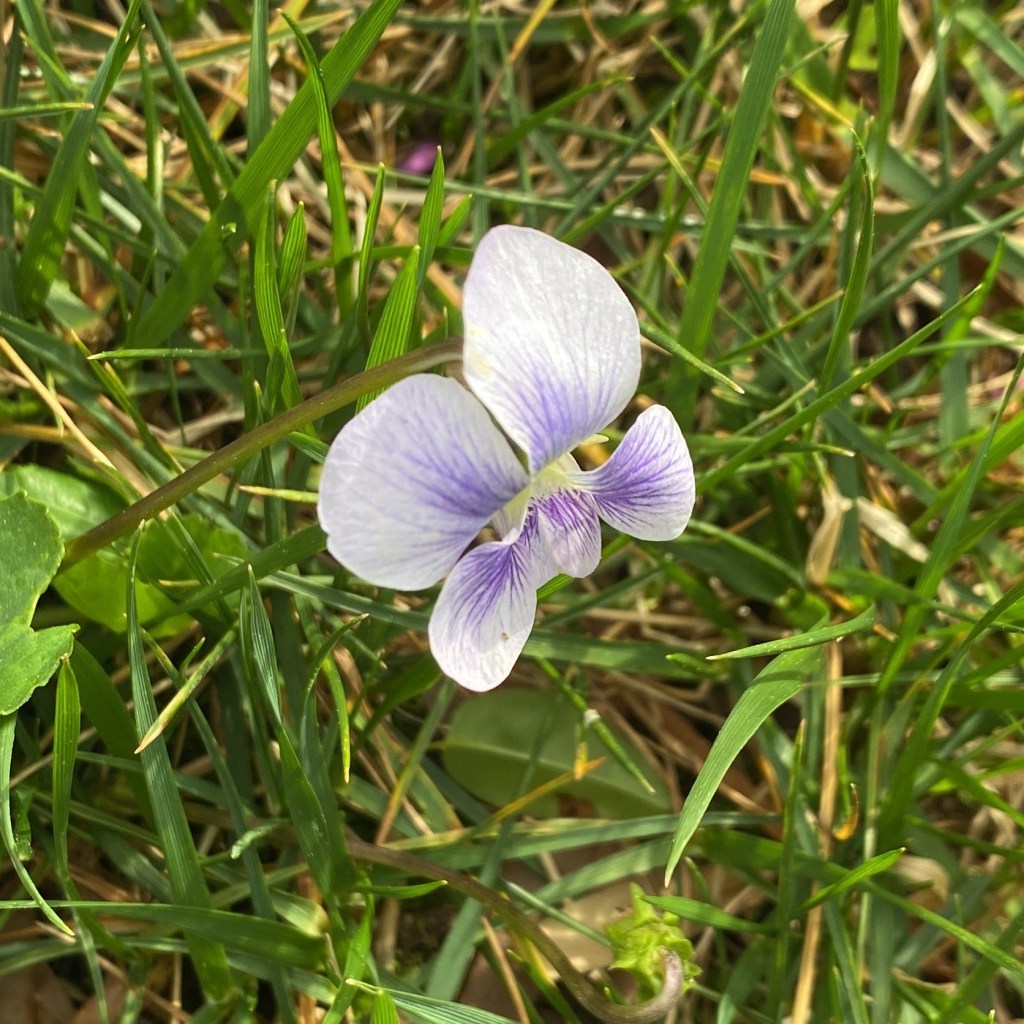
Finally, my favorite weed has appeared! Violets are all over one particular patch of grass, and I love it! These delicate blooms add such pretty colors to my yard. I have “confederate violets) a cultivated subgroup of the larger blue violet family. These are edible but I’m not interested in consuming them: I just love to look at them.

Blue violet

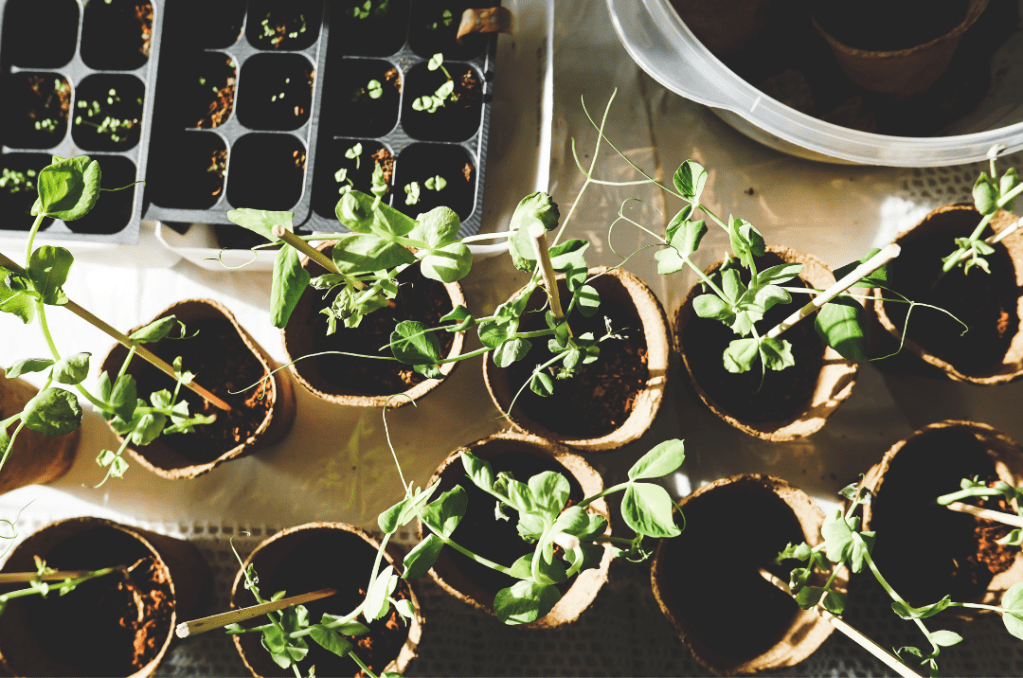
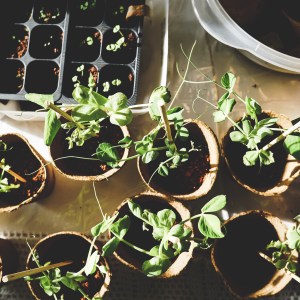
I’m looking forward to seeing what will bloom at the end of this month, and in May. I planted a few seeds, so I’m hoping that those flowers will be blooming in a few weeks.

Did you do any planting or foraging yet? I’d love to hear all about it!

beauty · life curation · luxury · style

Get Ready With Me – Trying Makeup From The Beem Box

Happy Monday, friends! I hope you all have been doing well. I took a little blog break because my offline life was crazy for a few weeks. That being said, I decided to do a video putting on my makeup and discussing what’s been happening in my world. As a bonus, I used products from previous Beem Boxes. I’ve mentioned Beem Box in other posts (like this one and this one) and I was really excited to show how certain products looked on my skin.

Enjoy, and I’ll be back with more content tomorrow. Take care!

health

Fibro Friday: Managing Inflammation with Turmeric

Happy Fibro Friday! I hope your week was great, and I hope your upcoming weekend is even better!

Over the past few months, I’ve been keeping close tabs on my fibromyalgia: I’m looking out for new (or recurring) symptoms, any difficulties in recovering after flares, or other changes that may be worth noting. I keep up with these because I stopped using prescription medication a few months back, and this is my first time – since my diagnosis – observing how fibro shows up in my daily life when managed through other methods.

As part of my symptom (and overall health) management, I’ve been incorporating supplements that promise to reduce pain and inflammation in the body. While fibro is not an autoimmune condition, nor is it a condition that is typically associated with inflammation, my research confirmed that inflammatory conditions exist in most people’s bodies, and most of us benefit from the reduction of inflammation. For this reason, I decided to add turmeric into my daily supplements.

I opted for a liquid supplement, and, since my flexible spending plan covers glucosamine and chondroitin products, I got a glucosamine supplement that also included turmeric (2 for 1!). I have thoughts on glucosamine products that I won’t share today, but I’ll touch on that in a future video. Anyways, back to turmeric: I decided to use Tropical Oasis Joint Complete Premium Plus- Liquid Joint Support Supplement w/Glucosamine, Chondroitin, MSM, Plus 800mg Turmeric Curcumin. I took this product for more than 30 days, and I did this consistently, just so that I can confirm whether I have gotten any results.

Here is my YouTube video discussing fibro and inflammation:

And here’s a YouTube video that I posted earlier today, discussing the outcome of my experiment:

I have to conclude that, while I didn’t notice an immediate or drastic difference in how I felt, I compared the way I felt to how I usually feel in the winter season and I took note of what symptoms were present, missing or mitigated. In previous winters, I am extraordinarily achy, tired and suffer from mild flu-like symptoms, even while taking prescription medication. However, this year, I only felt a little tired and very few aches. I only noticed flu-like symptoms when I actually had the flu (you can read about that ordeal here). So, comparing this year to prior years is the best metric I have, and I can confidently that adding turmeric was a good move for me. I didn’t feel the normal winter “slump” that I usually experience, and I found myself needing less down time when I felt a little tired. I also started adding another supplement into my rotation (more about that next week) and that has been making a difference, too, though I only added that in toward the end of the turmeric experiment, well after I determined how effective the turmeric was for me.

I’m also considering adding in a different turmeric supplement to see if I have different results. I’m thinking I’ll choose between Qunol Liquid Turmeric Curcumin with Black Pepper, Dr. Mercola Organic Fermented Turmeric, Turmeric Gummies for Adults & Kids with Ginger & Black Pepper Extract, or I may try something completely different. You’ll just have to stick around to see what I choose!

That’s it for today. I hope you all have a great Friday and a fantastic weekend! Take care, and I’ll talk to you all tomorrow!

*This post contains affiliate links.

goals · health

Fibro Friday – The Berg Protocol

Happy Fibro Friday! I always love sharing information and updates regarding the world of fibromyalgia, but I realized as I started typing this post that I haven’t provided an update on my personal health. I think I am overdue for a discussion about my fibro journey and experience. So I’ll give you a brief update on my health, then I’ll dive into the Berg ProtocoI haven’t been in much pain recently, and my energy levels, while lower than I’d like, are stable. I’m still using gabapentin and I haven’t felt a need to increase my dosage. I’m thankful that I am still in the low dosage range and haven’t needed to implement any additional pain relievers. Overall, so far, so good.

Now, back to today’s topic. Today we’re exploring the recommendations for treating fibromyalgia that are promoted by Dr. Eric Berg. Dr. Berg is a chiropractor that offer his health perspective and recommendations on YouTube. I would be remiss if I didn’t discuss the fact that Dr. Berg is at the center of a controversy involving his son, Ian. Ian revealed that Dr. Berg is a Scientologist and a narcissist that mistreats individuals that decide to leave the Church of Scientology. These facts have given me pause when it comes to purchasing Dr. Berg’s products, and even promoting his videos can be an indirect way of supporting him. Further, I don’t want to victimize Ian further by indirectly supporting his father.

That being said, I want to add that disclaimer so you can decide whether you want to continue reading this post or whether you want to skip this week’s Fibro Friday. I don’t want to skip over the statements against Dr. Berg just because he offers solutions that may work for one of us fibro warriors. Dr. Berg offers some treatment options for fibromyalgia that may be worth considering, especially for those of us who prefer natural and alternative treatments. While Dr. Berg doesn’t have a large collection of videos dedicated to fibromyalgia, he does have a few videos discussing conditions that may be misdiagnosed as fibro. Also, he provides tips on reducing chronic fatigue and pain that comes along with fibromyalgia. Here is one of Dr. Berg’s videos that you may find informative:

The Berg Protocol can be summarized as follows:

  • Consider whether your fibromyalgia may be related to a congested gallbladder; if so, start supporting healthy gallbladder function to get relief
  • Increase vitamin D3 intake in order to reduce or eliminate pain
  • Try acupressure for relief
  • Ketogenic dieting and intermittent fasting are recommended

I think that Dr. Berg’s recommendations are very similar to Dr. Berry’s statements (which I reviewed last week). However, Dr. Berg’s experience as a chiropractor means that his perspective originates from a different point that Dr. Berry (who is a MD). While I haven’t explored all of Dr. Berg’s recommendations, I have been increasing my vitamin D3 intake and it does seem to give me a bit of an energy boost (though my chronic fatigue is still in full effect).

That’s all for my brief overview of Dr. Berg’s protocol. If you’ve implemented any of his tips, I’d love to hear about your experience in the comments below.

Have a great weekend! I’ll talk to you all soon.

health

Fibro Friday : My Magical Body Balm for Muscle and Nerve Pain Relief

Happy Fibro Friday, friends! I sincerely hope that you’ve had a great week, and I hope that your weekend is amazing!

Recently, I shared with one of my favorite vloggers, Deena from Adventures with Fibro, that I make a body balm that helps with both muscular and neurological pain. I also promised her that I would make a video. And yes, I kept my word.

If you have fibromyalgia, you are already intimately aware of the pain that occurs due to the condition. But if you don’t have the condition, I’ll try my best to explain it to you. The pain that comes from fibromyalgia is often diffuse: it’s not usually concentrated into just one spot. And the pain goes beyond just soreness (as if you overused a particular muscle group): the pain can include stinging, burning, prickly, tingly, or throbbing sensations.

Many of the products available for pain address the muscle component exclusively. So the neurological pain (or neuropathy) remains unaddressed. You usually have to use medication prescribed by a neurologist or a rheumatologist to alleviate the nerve pain. Sadly, these medicines do a poor job of offering relief, and can have a range of awful side effects.*

So I opted to create a product that could give me relief for both body systems (musculoskeletal and nervous). In this video, I give a nice, customizable recipe that can offer you some relief and hopefully make your flare days a little more tolerable. I’m writing out the recipe and instructions on this post, to be followed by a link to the video.

Magic Body Balm (makes 4 ounces (120 ml) of product)

  1. A few weeks prior to making this balm, purchase dried arnica and place 1 or 2 ounces of the dried plant into 2-3 ounces of avocado oil. Let it sit for several weeks in a dark, cool spot, gently shaking the oil every couple of days.
  2. Start by placing the nut butter into the glass bowl.
  3. Fill the bottom of the shallow bowl with less than 1 inch of boiling hot water. You only need enough hot water to cover the bottom of the shallow bowl.
  4. Place the glass bowl with the nut butter into the shallow bowl, allowing the hot water to heat the bottom of the glass ramekin and start melting the butter.
  5. THIS IS CRUCIAL – Avoid getting any water into the liquefying nut butter, the oil additives, or any other ingredients. This will prevent bacteria from growing in the balm.
  6. While the nut butter is melting, strain your arnica infused oil. (Skip this step if you’re using pure arnica oil that you purchased).
  7. Once the nut butter is liquefied, combine it with the arnica infused oil (or the pure avocado oil and arnica oil drops), copaiba oil, davana oil, and fragrant oil of your choice (I prefer tangerine, lavender or peppermint oil). Stir well.
  8. Pour the mixture into the container of choice. Place in a refrigerator to let it cool and set (roughly 1-2 hours). Remove and use on achy, sore body parts.

This recipe is mostly relying on eyeballing the measurements, so if it isn’t exact, try adjusting individual ingredients until you get the consistency you prefer. I’m linking the ingredients and tools above, so you can easily get what you need. I hope this helps you! Take care, and enjoy your weekend.

* Disclaimer: I use two medications for neurological symptoms. I weighed the efficacy versus the side effects, and I determined that it was worth the risk. Discuss the options with your doctor to see what is recommended for your condition.

This post contains affiliate links.

reading list

Book Review: Lunar and Biodynamic Gardening

Hi friends! I’m really excited to discuss today’s book with you all. As you all may know, I’m still a new(ish) homeowner, and I love flowers and gardening. So instead of waiting until March or April to start thinking about my garden, I decided to begin my garden planning now, so that I can hit the ground running after the first frost.

The book I’m reviewing is Lunar and Biodynamic Gardening by Matt Jackson. The book focuses on gardening in a way that allows you to create an optimum environment that supports the plants organically. This focus on healthy soil, working with nature’s natural rhythms, and disturbing the environment as little as possible makes it so that both the plants and all wildlife thrive.

Unfortunately, I got this book from the Dollar Tree and I’m unable to locate it on Amazon. However, the author has another book on Amazon that may be worth checking out (it covers the lunar phases and their effects on plants). Make sure to check that out if you enjoy this sort of content.

This book is broken down into six, easy-to-read chapters. The first chapter teaches the basics, explaining what lunar gardening and biodynamics are, and how these two differ from one another. The next chapter outlines what you need to start, depending on the size of your intended garden. The next chapters focus on soil and compost, growing food, growing flowers, and container gardening.

The author resides in the UK, so he is located in the Northern Hemisphere like me. But, he has generously provided resources for readers that may be in the Southern Hemisphere. He also shares resources to help readers get further clarification on certain principles.

I love how accessible lunar and biodynamic gardening approaches can be for novices. Jackson does a great job explaining how to work with various yard/garden sizes. My yard is medium sized, but my garden will be planned as if I have a small yard, and if I’m inspired, I will expand in future years. It’ll be great to start small so I can really master the concepts before I dive deeper.

In this world of law of attraction/conscious creation, it’s really easy to focus on the spiritual or esoteric sides of things to the point where we may not see the practical side of tuning into nature. But this book is a great reminder of how energy works, and how everything works together. I’m fascinated by the moon cycles, and I’m eager to see how these principles influence my garden’s success. I’ll be writing about this in upcoming posts, so look out for updates!

That’s it for today. I hope you all are staying safe and having a great day. Take care!

*This post contains affiliate links.

health

Herbalism: My Favorite Tools

As a baby herbalist, I feel fortunate to have so many tools at my disposal. Plant identification apps, online herbalist courses, and countless hours of discussion on YouTube have really opened my eyes to the depth and breadth of the herbalism world.

Today, I’ll be sharing a few tools that I’ve found invaluable in my growing herbal practice. If you’re interested in taking your wellness back into your own hands, I implore you to research safe and effective plants that you can incorporate into your wellness plan, and then venture out into preparing those plants in different ways: as infusions (teas), tonics, tinctures, poultices, and more. The more that you experiment, the more that your knowledge grows. I hope this little list of tools helps you. Enjoy!

One of my first major investments into my herbal practice is my drying rack. I love using this when preparing herbs that I harvested myself, or when I purchase a bundle of fresh herbs at the store. This one by Adwaita is large, and can accommodate a lot of plant material. I use this almost every day, as I frequently find myself eager to preserve my fresh herbs.

After trying to crumble herbs by hand a few times, I knew that I needed a mortar and pestle. This one has a really nice weight and ergonomic design. I love that it doesn’t shift around when I use it: the weighted base keeps the bowl firmly in place. It also has a sleek look that I enjoy.

I regularly prep my herbs on this cutting board. It’s a large and attractive workspace: using it is always a pleasure. I sometimes use it to take photos of some of my herbs as I’m trying different blends. I love this work surface!

Eventually, I’ll be standardizing some of my preparations, so an inexpensive digital scale was a must. I purchased this last week but I haven’t used it yet: I’m looking forward to eventually offering my herbal mixtures and I fully intend to be consistent in my formulations.

These are my favorite herbal tools at this point, and I’m slowing growing my collection to include all of the tools that I need to create the herbal products that I enjoy using. That’s all for today: let me know if you use anything like the items that I mentioned above!

beauty · health · life curation

June Empties

Hi friends! I was feeling a little unwell, so I skipped yesterday’s post, but I’m making up for it by posting a HUGE June empties post! I am amazed at how much product I emptied last month. In a future post, I’ll explain why I’m focusing on empties and the overall goal of this little project. For now, here are my thoughts on my June empties. Enjoy!

So I have a LOT of perfume samplers/minis. I adore scent so I like to purchase trial sizes so I can try a fragrance without having to make a huge commitment. I had a trial set from Commodity which I had planned to review but I ended up disliking most of the scents so I didn’t bother to write about it. However, there were three fragrances I really enjoyed, and I ended up using the last of those this past month. Magnolia, Mimosa and Tea were lovely fragrances that I look forward to wearing again. On a side note, I saw that Commodity closed unexpectedly on March 31st, but the brand was saved by an investor and is experiencing a reboot, so the fragrances can still be purchased at this time.

Magnolia by Commodity
Mimosa by Commodity
Tea by Commodity

Onward to skin care . . . I really love The Ordinary, and I’ve discussed it multiple times so I’ll spare you my profuse praise. However, I used up my Argireline Solution this past month. I love to use it on my smile lines and forehead creases. I’ll purchase more after I use up some of my other products for facial lines (like The Ordinary’s Alpha Arbutin).

Argireline Solution 10%

As far as body care goes, I finished using my mini L’Occitane Amande Shower Oil. I got this as part of a L’Occitane gift set earlier this year. This product smells incredible: floral yet slightly musky at the same time. The scent doesn’t linger, but the moisturizing effects remain after scent dissipates. Once I use up some of my other body washes, I’ll repurchase this.

L’Occitane Amande Shower Oil

Now onto hair care. The funny part of my hair care is that it’s minimal at best: I don’t spend a lot of time on my hair, though I anticipate that will change in the upcoming months. I use these very inexpensive conditioners to detangle my hair prior to shampooing. My hair is kinky/curly so I use a lot of product to detangle and moisturize. VO5 and Pantene are low-priced so I don’t mind being a little “heavy-handed” when applying. When I’m running low on deep conditioner, I will use the Pantene to help “stretch” the product.

VO5 Passion Fruit Smoothie conditioner; Pantene Curl Perfection conditioner

After shampooing, I apply a deep conditioner to help moisturize my hair and restore the protein balance. I recently finished this jar of Aphogee Curlific Texture Treatment and I must say that I’m VERY impressed with this product. I noticed that my hair retained a “stretched” state once dried, and my post-shampoo detangle session was a breeze. If you want a product that can help elongate the hair in preparation for stretched or straightened styles, this is a great product to try.

Aphogee Curlific Texture Treatment

After shampooing and deep conditioning, I moisturize using the LOC method – Liquid, Oil, and Cream products, applied in that order. My liquid product of choice is Infusium 23 Leave In Treatment. This bottle was large, so it took a while to use it up. I occasionally tried other liquid leave-ins, but I always end up coming back to Infusium 23. I only wish that the product was in a different bottle (with a spray top). I ended up transferring the liquid to a spray bottle for easier application.

Finally, I finished a tube of an eco-friendly toothpaste that I purchased. Hello Epic Whitening Toothpaste has activated charcoal and acai berry, along with mint for freshness. The product is black but it brightens the teeth as you use it. I love the flavor and I enjoyed the results. I’ll certainly use it again, but I have a TON of toothpaste that was gifted to me (long story LOL) so it will be a while before I do a repurchase.

Those are my empties for June! I love that I have so many items that I’m using up completely before repurchasing. It feels good to know that I’m being smart with my money and purchasing from an empowered, instead of desperate, emotional space. I’ll talk to you all tomorrow!

***Post contains affiliate links

beauty

Review: Pixi Rose Tonic

I will be showing a bunch of my May empties tomorrow, but today, I wanted to spotlight one noteworthy “empty”. This is a product that I’m certain I will purchase again.

The Pixi Rose Tonic is a refreshing product that I tried for a few days in May. For those that have been here for a while, you all know that I use a slightly modified version of the Korean ten-step method, which calls for a toner (to balance the skin and remove any traces of makeup or cleansing product) and an essence (to add additional nourishment to the skin). So this rose tonic was intriguing to me: I wanted to see whether it was more like a toner or if it was more similar to an essence.

Pixi Rose Tonic

This gentle, alcohol-free product combines the features of a toner with some of the benefits of an essence. Yes, it is a toner: it will help to balance the skin, neutralize the skin mantle (this prevents the mantle from being compromised, which can result in damaged, more sensitive skin), and remove any remnants of makeup or previously applied skin products. However, the product contains aloe vera, chamomile, elderberry, tea extract, and the extracts of several different rose variations (including Rose of Damascus and dog-rose). These act as skin soothers to leave the face feeling clean yet hydrated and nourished.

One of the ingredients in the tonic is dog-rose essence

My bottle was a sample size, so I didn’t have enough product to use for longer than about 10 days. However, I LOVED the way that this made my face feel. My skin felt hydrated and not stripped at all. I also love that this product didn’t conflict with any of the other products that I use on my face.

My sample was teeny-tiny but I was still impressed with the product

Would I recommend this? Absolutely! I intend to purchase another bottle as soon as I’m done with my current toners. I looked at a few vendors to see who had the best price, and the cost on the Pixi website is significantly less than Amazon, and a bit less than Ulta. This is NOT a sponsored link, so if you’re curious about the product, please know that I’m endorsing it without any personal motivation LOL!

That’s my review on Pixi Rose Tonic. Have you tried this product before? I’d love to hear all about your experience with it!

beauty · life curation

The Novice Gardener’s Digital Toolkit

untitled designAs this is my first year cultivating a true flower garden, I’ve been eager to learn as much about the plants surrounding my home as I can. Sadly, I don’t know much about plants and I don’t have any nearby friends or relatives that can easily identify the bushes and trees in my yard. Desperate, I reached out to my Facebook family, and they didn’t disappoint! They made some excellent recommendations to help me get the information that I need. So, since I have some great tools at my disposal, it’s only right that I pass them along to you!

PlantSnap and PictureThis have been my constant companions over the past few weeks. I love that I can take a picture of a plant and process the picture through both apps to get a good idea of what kind of plant it is. I find that PictureThis has more reliable results than PlantSnap, but I love them both and find them very easy to use. I really enjoy the fact that the apps allow you to identify plants for free, and PlantSnap even lets you know that you can identify 25 pictures per day before a paid account is required (I’m not sure how many pictures are allowed using the free membership of PictureThis, but I imagine that the number is similar). The biggest advantage to PictureThis (other than the higher identification reliability) is that it automatically keeps a log of the pictures that you’ve submitted, so you can easy review previously identified plants within the app. For PlantSnap, you have to manually save the photos to a collection in order to retain that information.

YouTube has so many great videos for learning more about the wild plants growing near you: I simply cannot list them all! However, you can search for wild edibles by clicking here and you will find the most popular videos on the topic. Of course, you may not be interested in plants that you can eat; however, edible plants are fascinating to me, and the fact that many “weeds” are also edible and nutritious makes it a topic that I think may interest some of you, as well. As I continue exploring various YT channels, I’ll make a post in the future listing the best gardening channels that I’ve found.

Finally, the USDA Plant Hardiness Zone Map has been one of my favorite references during this growing season. Viewing the zone map and using other USDA resources has taught me a lot about what kind of zone I live in, as well as the different zones within my state.

Do you have any digital tools that you use for your garden? I’d love to hear all about them!