art · culture · travel

Throwback Thursday Travel: New Orleans

img_0869

Laissez les bons temps rouler! (Let the good times roll!)

I went to New Orleans in 2011, a few weeks after I got married. So, this trip was almost like a honeymoon, though we had an official honeymoon trip several months later.

I fell in love with the Big Easy, and I hope to return within the next year or so. However, I’ll be sure to visit during the cooler months: the summertime is unbearable hot! In any case, here are some of the pictures I snapped during my trip. Enjoy!

I loved seeing the street names in the sidewalk

img_0843

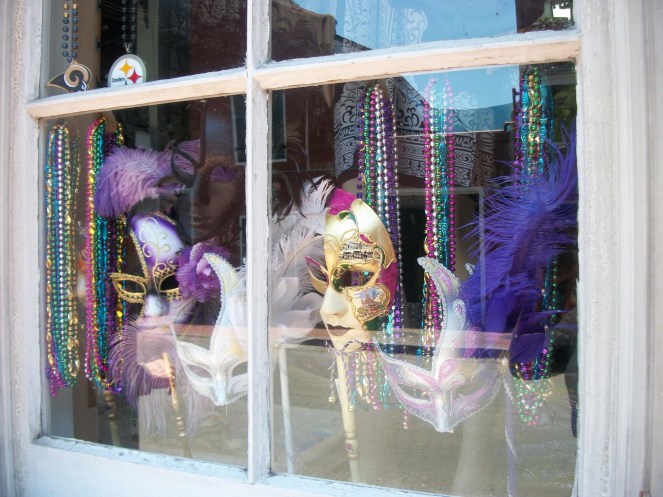
A souvenir shop on Canal

Fun in the French Quarter

img_0852

I wish I had a chance to go into Harrah’s, but we were having way too much fun taking in all of the sights


As I look through my photos, I realize this post really needs a Part 2. So look out for some additional New Orleans pictures soon.

Have you ever been to New Orleans? I’d love to hear all about it. Have a great Thursday!
beauty · life curation

The Novice Gardener’s Digital Toolkit

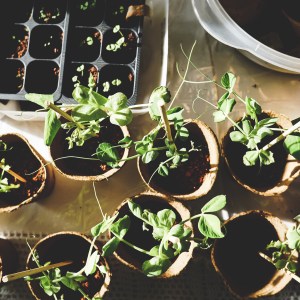
untitled designAs this is my first year cultivating a true flower garden, I’ve been eager to learn as much about the plants surrounding my home as I can. Sadly, I don’t know much about plants and I don’t have any nearby friends or relatives that can easily identify the bushes and trees in my yard. Desperate, I reached out to my Facebook family, and they didn’t disappoint! They made some excellent recommendations to help me get the information that I need. So, since I have some great tools at my disposal, it’s only right that I pass them along to you!

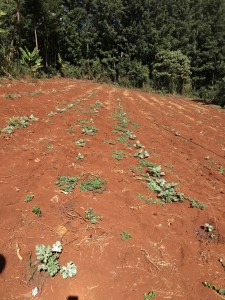
PlantSnap and PictureThis have been my constant companions over the past few weeks. I love that I can take a picture of a plant and process the picture through both apps to get a good idea of what kind of plant it is. I find that PictureThis has more reliable results than PlantSnap, but I love them both and find them very easy to use. I really enjoy the fact that the apps allow you to identify plants for free, and PlantSnap even lets you know that you can identify 25 pictures per day before a paid account is required (I’m not sure how many pictures are allowed using the free membership of PictureThis, but I imagine that the number is similar). The biggest advantage to PictureThis (other than the higher identification reliability) is that it automatically keeps a log of the pictures that you’ve submitted, so you can easy review previously identified plants within the app. For PlantSnap, you have to manually save the photos to a collection in order to retain that information.

YouTube has so many great videos for learning more about the wild plants growing near you: I simply cannot list them all! However, you can search for wild edibles by clicking here and you will find the most popular videos on the topic. Of course, you may not be interested in plants that you can eat; however, edible plants are fascinating to me, and the fact that many “weeds” are also edible and nutritious makes it a topic that I think may interest some of you, as well. As I continue exploring various YT channels, I’ll make a post in the future listing the best gardening channels that I’ve found.

Finally, the USDA Plant Hardiness Zone Map has been one of my favorite references during this growing season. Viewing the zone map and using other USDA resources has taught me a lot about what kind of zone I live in, as well as the different zones within my state.

Do you have any digital tools that you use for your garden? I’d love to hear all about them!

culture · food · international

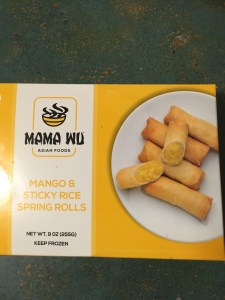
Snack Review: Mama Wu Mango & Sticky Rice Spring Rolls

While quarantined, I haven’t been enjoying takeout as much as I used to. However, I still enjoy trying new foods, especially snacks. So when I saw this food that combines two of my favorite snacks – spring rolls and Thai mango and sticky rice – I couldn’t resist. I had to try it!

img_0753

Mama Wu Mango & Sticky Rice Spring Rolls were easy to prepare. The rolls had a crispy exterior after baking, and I was excited at how the texture of the baked spring roll was similar to a fried roll. I was concerned that the roll would be a tad bit soggy, but it was crispy, crunchy and delicious.

img_0754

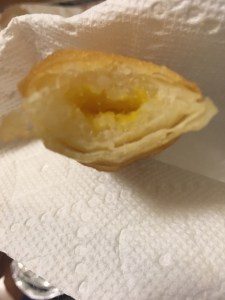
A perfectly crisp spring roll

Now, when it comes to the filling . . . Let me qualify this by saying I’ve had many different mango and sticky rice desserts. I’ve eaten at over a dozen different Thai restaurants in different cities and I usually have my mango and sticky rice at each one. So, I feel really comfortable saying that I know what the dessert should taste like. This interior was not as tasty as I’d hoped. It was especially chewy, and the mango flavoring wasn’t as prominent as I’d like. So the filling wasn’t as delightful as the exterior, unfortunately.

img_0755

The interior wasn’t as tasty as I hoped

Here’s the rub: I was looking forward to the filling more than the outside, yet the outside was the best part of the snack. But, I don’t think that this product is a complete fail: in fact, I can think of a few ways that it can be improved. First, the company should tinker with the rice recipe to see how to prevent the rice from getting too “tough” when baking. Also, a little more mango would be wonderful. Finally, this needs COCONUT SAUCE! These rolls practically begged to be dipped into a creamy, sweetened coconut sauce to amp up the flavor and to add a contrast to the crisp exterior.

Would I try this again? Sure, especially if I had my own coconut sauce (or if the company started including sauce with the rolls). I’d be sure to have some additional mango to accompany these rolls, too.

Have any of you tried these before? Or, do you have another Thai dessert that you prefer? Let me know all about it in the comments below!

beauty · style

My Boohoo Wish List

It’s been quite some time since I discussed fashion on this blog. I take it that this means that I’m starting to feel more like my old self (which is a good thing!). I still love fashion, though it took a backseat to my physical and emotional health over the past 18 months.

However, a recent haul video done by the lovely Jessica over at Wigs and Wanderlust reminded me of my love of Boohoo clothing. The clothing is, as I’ve heard it described, “cheap and cheerful”, but the designs are cute and last a while when you take good care of them. So I decided to see what beauties Boohoo had for me. I wasn’t disappointed with what I saw!

Full disclosure: I adore midi length dresses, so pretty much everything will be a little longer than many of the designs offered on Boohoo. I will occasionally wear a shorter length, but something about midi-length dresses make me feel sleek and more elegant.

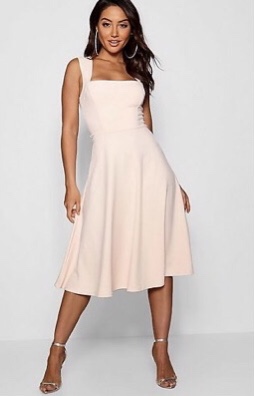
This square neck midi skater dress is dreamy: it looks cute and summery, and there’s a lot of potential to dress it up or down. I’d love to get this one in a couple of colors.

img_0832

The pleated bodice on this midi dress is so dynamic, yet the overall silhouette is controlled and sleek. The pleated top bandeau midi dress is a great option for a summertime cocktail party.

img_0828

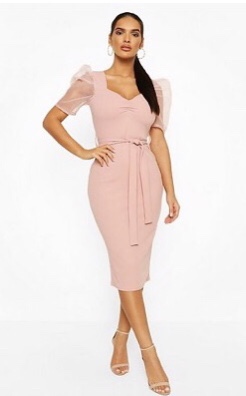
The puff sleeves may sound a little silly, but paired with the structured bodice and sweetheart neckline, this organza mesh puff sleeve midi dress is a stunning study in harmonious contrasts.

img_0831

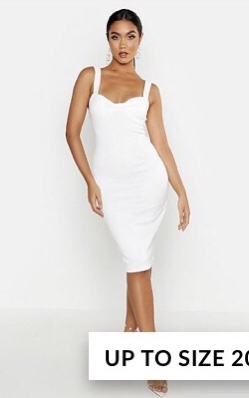
The blue version of this dress reminds me a bit of a design offered on Boohoo a few years ago that I adored. However, I like the white version of this bust detail porcelain print midi dress. I’m not sure if the print is visible in person, as it would be white-on-white. But if it has a slight contrast, it could be very pretty when viewed in real life.

img_0824

These are just a few of the designs that won my heart over at Boohoo. I don’t have anywhere fancy to wear them, but at this point, I love dressing up to walk around the house LOL!

Have you been making any wish lists recently? I’d love to hear all about it in the comments below!


beauty · luxury

Bath Bombs: The Finished Product!

Happy Friday, friends! I’m skipping Fibro Friday since I wrote about my fibro experience a couple of days ago, which was Fibromyalgia Awareness Day. So, instead, I figured I’d used this Friday to post an update of the bath bomb project that I mentioned previously.

I looked at a couple of recipes, all of which had a basic set of shared ingredients. I ended up using this one posted on the Byrdie website. I purchased everything I needed from the Dollar Tree and Amazon. I purchased a bath bomb/ice cube mold but, if I may be honest, I don’t think you need it. Decorative mold trays are much better, as are the inexpensive condiment containers (usually with 8 or 10 containers in a pack) that you can purchase at the Dollar Tree.

Here’s the bath bomb mold I used: I preferred using a condiment container as a mold instead. I’ll end up using this for large ice cubes instead.

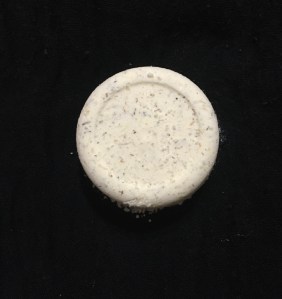
I used the basic recipe as shown on Byrdie, then I added my own twist to it. I put in 4 drops of yellow food coloring (just to give a hint of color) and several drops of lemongrass essential oil. I also unraveled a single chamomile tea packet and threw the contents into the bath bomb mix, for flair.

Here’s the finished result!

img_0752

I love the intoxicating smell of lemongrass. If you love citrus scents that have herbal/grassy notes, then lemongrass is one that you should try for yourself. This bath bomb smells heavenly. I’m not concerned with it being moisturizing: I really made it for the aromatherapy benefits. However, the bath bomb also has coconut oil, so it shouldn’t leave my skin feeling stripped and dry.

I’m excited to try this! Have any of us you tried anything similar? Let me know in the comments below. Have a great weekend!


(This post contains affiliate link)

art · culture · travel

Throwback Thursday Travel: Kenya, Part 1

Nairobi remains one of my favorite places on Earth. I wrote a while ago about my Kenyan adventures. Here are some few more pictures from that trip that I hadn’t shared before. I’m breaking this into two parts, because one day of my trip involved a trip outside of Nairobi (to my friend’s family farm) and there are pics from the Nairobi National Museum that weren’t shared in this post. Today’s post features pics from the farm. Enjoy!

This particular cow was my friend’s favorite on her family’s farm

img_3027

Just a turkey, minding his (or her) business

img_3029

Adorable piglets and their momma!

img_3030

Because the climate in Nairobi and the surrounding areas is favorable for gardening during most of the year, my friend’s family farm basically produced food year round.

img_3031

Lush views surrounding the farmland

food · life curation · luxury

Learn About Tea – For Free!

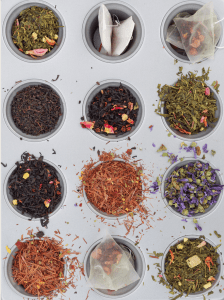
On Facebook, I recently saw an ad from The Republic of Tea, offering a free email course about tea. Tea 101: An Educational Email Series promised to deliver, over a 6 day period, information about the “nuances and complexities of premium tea”.

I’m a sucker for nuance and complexity, so I happily dove into the emails as they arrived.

Mustard and Olive Chic Lifestyle Blogger Blog Post Social Media Graphics

The lessons cover the different aspects of distinguishing between and enjoying tea. The lessons are brief and to the point, so they are perfect for busy people.

I especially enjoyed the emphasis on the fact that herbal teas aren’t true “teas” (the only true “tea” is the leaf of the camellia sinensis plant). However, the company still took time to explain the benefits of herbal “teas” and blends. I also liked the description that Republic of Tea provided, regarding the caffeine levels in varying tea varieties. It was good to see which teas provide light, medium and heavy caffeine.


health

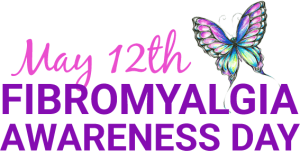
Fibromyalgia Awareness Day

I try to bring awareness to fibromyalgia every week via my Fibro Friday posts, but I wanted to spend this Tuesday, Fibromyalgia Awareness Day, as an opportunity to share some of my insights about my condition.

32256237_1691747310917246_2687018461925736448_n

(Photo credit)

My fibro journey has been an absolute roller coaster at times. There have been some intense highs (finding occasional relief and modifying my lifestyle to make things easier for me), and some dramatic lows (which I won’t be reliving here on the blog LOL!) In any case, I’ve learned so much from this experience, and despite the discomfort, I’m thankful for this condition.

Yes, I’m thankful for fibro.

If I hadn’t been diagnosed with fibro, I would have continued to overwork myself, abuse my body through inconsistent sleeping, and deny that a deeper part of myself needed healing. My fibro forced me to slow down, learn how to really care for myself, and start taking the steps to live an authentically healthy lifestyle. Fibro led me to relocating to my dream home (which is closer to my healthcare team), find work that wasn’t mentally draining, and gave me an opportunity to spend more time at home with my family.

Mustard and Olive Chic Lifestyle Blogger Blog Post Social Media Graphics (1)

Fibro forced me to re-examine the balance within my life

Most importantly, living with fibro taught me to ask for help and to allow others to help me. I was so independent and “strong”: I never felt the need to ask for help. But now I’ve learned to rely on my wonderful support network and I can really appreciate the way that my love ones have rallied around me.

Fibro was the most painful gift I’ve ever received, and I’m grateful for it.

I can’t speak for everyone diagnosed with fibro, but as for me, I see the silver lining to this “purple cloud”. And I’m okay with how things are unfolding for me.

That’s all for today. If you know anyone suffering from fibro or another chronic illness, please send them some love today. Take care!

beauty · luxury

Review: Givenchy Teint Couture Everwear Foundation

Here’s a sample that I have had for a while, and I’ve been looking forward to reviewing it. I enjoy luxurious cosmetics and I was excited to try a foundation that I’ve never used before.

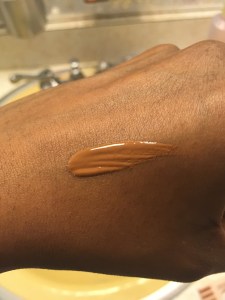
I got this sample of Givenchy Teint Couture Everwear Foundation in one of my Sephora orders last year (I will share my current opinions on Sephora in a future post). The shade closest to my complexion is Y400 (a medium-to-deep shade with warm undertones). The sample had enough product for two applications, so I tried two different application techniques. The first time I used it, I used a foundation brush, while the second application was done with my fingers.

Both times, the product applied smoothly and had a beautiful color. Unfortunately, it oxidized a bit more than I liked, and the best way to keep it from being too dark on my skin was to make sure that I highlighted my face heavily (more than I normally do). Also, I tend to do better with neutral undertones, so while it’s a beautiful product, I would need to try a different shade.

img_0424

A swatch of Givenchy’s Teint Couture Everwear in Y400

I was excited to try it, and honestly, I wasn’t completely disappointed. The color wasn’t a perfect match (once it oxidized), but the coverage was good and the product felt lovely on my skin. This product is a little pricier than my normal foundation (it’s $52 per bottle) but if I found a perfect shade match, I’d be willing to invest in a bottle.

My skin with the product applied, two different light settings used

Have you tried this product before? How did you like it? Let me know in the comments below!

fitness · health

Fibro Fridays: Yoga for Fibro Relief

Happy Friday, friends! We’ve completed another week, and aren’t we happy for that? This first full week of May was pleasant, despite the fact that we’re all still adjusting to our collective new normal.

As a person managing fibromyalgia symptoms, I look for relief from multiple sources. I prefer to supplement my prescription and alternative medicine routine with physical activity that is gentle, effective and easy to do at home. For that reason, I turned to yoga tutorials on YouTube to help me to stay active and reduce physical pain.

Untitled design (5)

I’ve tried several different tutorials and I have a few that I can recommend. I hope that you can use these to get pain relief and feel better!

Firstly, Shima Flow Yoga’s Yoga for Fibromyalgia is the gentlest routine that I’ve used, and I always feel so good after I do it. It’s the perfect length (a little under 30 minutes) and doesn’t require any special equipment. I highly recommend this one!

Next, Sleepy Santosha’s Gentle Yoga for Fibromyalgia is a little longer than the previous video (a tad over 30 minutes) but is still a good one. This channel is really good because the yogi is a chronic pain sufferer, so she’s mindful of our physical limitations. I noticed that the routine is a bit more intense that the previously mentioned video, but I like that this channel does have multiple videos specifically for fibro.

Finally, when I’m pressed for time, I go to Shima Flow Yoga’s abbreviated Yoga for Fibromyalgia video. This video is less than 15 minutes and you can pace it as quickly or as slowly as you like.

Let me know if you try any of these videos, and how well they work for you. I’ll talk to you all next week. Take care, and enjoy your weekend!